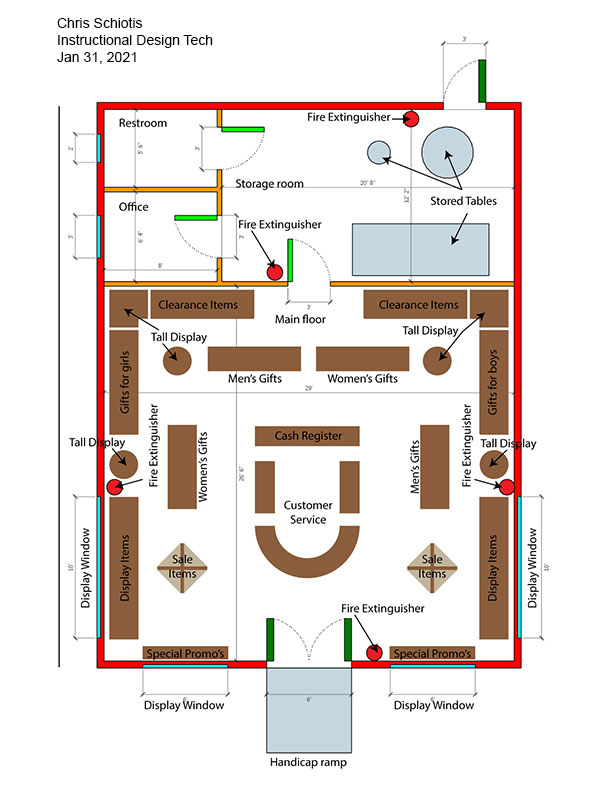
Final Submission

The intro video will gives us an overview of this phase and some guidance as to how we should approach it.
We will start this phase of the project by "placing" our image of our floorplan that we exported from SketcUp Pro. We will then size it to scale - or very close to that. It will fit on an 8.5" x 11" page so that it can be printed if so desired.
In this phase of this drawing, we wil use the rectangle tool to create what will represent "tables" in our floor plan. We will also learn some "reflection transform" tricks that will help us get our work done quicker!
This is another part of the assignment that will require some decision making on your part. We are going to have to consider product positioning. Where will the different items go and how will we "tier" them?
In this section we will continue to add display elements, including at least one cash register and four fire extiguishers. The video below will show us some cool techniques.
In this final section we will add all of the text to complete the floor plan. We will also be adding "callouts". This of course is the lines and arrows that point out the display elements of our store floor plan. There will also be information as to how we are to submit the final phase of this project for grading.
Good JOB completing this assignment!
Go to the instructions page for phase 1 of project 2: The 3D version of our floor plan.